Salted eggs – what are they, how to make them and how to use them, find out in this article!

What are Salted Eggs?
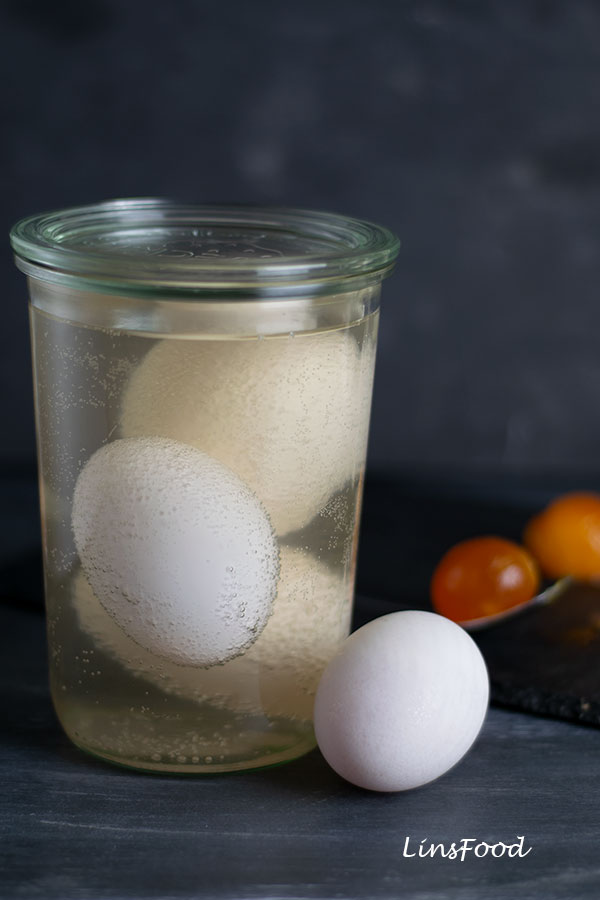
They really are exactly what they sound like – eggs that have been salted in brine over a period of time. If you have access to an East Asian store, you will find salted eggs in the fridge, packed in egg cartons. They can be just as they are, in their shells or covered in a thick layer of salted, black charcoal paste.
But if you can’t find them, I’ve got your back!
In the recipe card below, I give you 2 methods for how to make salted eggs at home, both involve soaking the eggs in a brine solution (salt solution).
The first method is what I would describe as the traditional one and requires soaking the eggs for 4-6 weeks. The second method is quicker, requiring only 8 days.
I also have 2 more methods for salting eggs or curing eggs, those are both on LinsFood. One of those methods is the dry curing process, as in we cover our yolks with salt and leave for a few days.
The other, is the Japanese method of curing egg yolks in soy sauce, giving you shoyuzuke ranou. I love this soy sauce version best! These are different from what are popularly called ramen eggs in the West, where the whole eggs are soaked in soy sauce, along with the shells.
Salted Egg Craze in Singapore
Salted eggs as we have in today’s post are a Chinese creation. If I remember correctly, they were first used as a filling for steamed buns and rice dumplings. But over the years, that’s expanded to so many other uses, most notably to stuff mooncakes with.
I have a cousin in Singapore who is salted egg crazy. She’s always sharing pictures of foods that have salted eggs in them in the family chat group. Many sound pretty good like stir fried prawns or chicken.
But some, like the durian and salted egg porridge was just far too crazy for me to contemplate. One of my favourite ways of enjoying them is definitely with a simple rice porridge or congee though, something I always crave when I’m under the weather.
They are also popular in the Philippines, where they are also called red eggs, or itlog na pula in Tagalog, because they are dyed red or a deep pink colour.
Ingredients
Salted eggs are so easy to make at home, whatever method you employ, with just the most basic ingredients and equipment. All you need is:
- Fresh duck eggs (chicken eggs will work too)
- additive free salt (so no table salt)
- water
- optional tiny amount of vinegar
- a large jar with lid
- a saucepan and utensils
and then, in the words of Axl Rose, ” all you need is a little patience”.
Optional Ingredients
You can flavour your homemade salted eggs to a certain extent with the use of other ingredients. What you use will depend on the final purpose of the salted eggs. Not all the flavourings are going to work for cured eggs meant for sweets.
Here are some additional ingredients you can add:
Savoury Purpose
- Shaoxing Rice Wine (or any rice wine)
- star anise
- cinnamon stick
- peppercorns (black or white)
- sichuan peppercorns
- slices of ginger
- garlic
Sweet Purpose (only on LinsFood!)
If you know you’re going to be using the salted eggs for desserts only, the following additions are fab.
- Honey or sugar stirred in
- Vanilla pod dropped into the salted water
- lemon, orange or lime slices
The Two Brining Methods
Both methods are very easy, with minimal prep time.
4-6 Week Soak
This is the traditional method. This is what we’ll be doing:
- Make your brine by heating the water with the added salt in a pot on medium heat. Leave this brine solution to cool completely to room temperature.
- Place your eggs in your jar and pour the cooled salt solution over them, completely submerging the eggs.
- Weigh the eggs down (explained in the recipeinstructions).
- Test 1 egg at 4 weeks. If it’s salty enough (it should be), drain.
8-Day Soak
In this quicker method for salting eggs, we soak the fresh eggs in vinegar for 24 hours. The science behind this is that egg shells are mostly made of calcium carbonate. And since vinegar is an acid, it will start to dissolve your egg shells, making them softer and more porous.
This allows the salt to permeate the shells quicker and get to the egg yolks faster. Don’t worry, you won’t taste the vinegar at all in the finished salted duck egg.
If using chicken eggs, reduce the vinegar soak to 6 hours, as chicken eggs have thinner shells.
So this is what we’ll be doing for our 8-day salted eggs method:
- Soak the eggs in a water and vinegar solution overnight (12 – 16 hours). Drain and gently rinse, the shells will have a bitty texture because of the calcium carbonate disintegrating.
- Make your brine by heating the water with the added salt in a saucepan over medium heat. Leave this brine solution to cool completely to room temperature.
- Place your eggs in your jar and pour the cooled salt solution over them, completely submerging the eggs.
- Weigh the eggs down (explained in the recipe).
- Drain after 8 days and use.

How to Store Homemade Salted Eggs
You always want to store your salted eggs or cured eggs in the fridge.
When you buy them from your local East Asian store, they usually have a pretty long use-by date. I believe something like 2-3 months. However, homemade salted eggs are best used within a shorter period of time after being drained.
Store them in the refrigerator in a covered container for up to 1 month. When I’ve kept them for longer, not all the eggs have been viable. So best to stop at 1 month of storage.
How to use Salted Egg Yolks
I don’t have any recipes on this site featuring the use of salted eggs yet, but I promise they’re coming. By the time you get them done the traditional way, I’ll have at least a couple for you!
So besides moon cakes and dumplings, you can use them in many other ways too, they add a lovely depth of flavour and saltiness. Salted egg yolks are not runny, so you’ll want to fork them to mash them up before adding to recipes. Unless you intend to use them whole for stuffing that is.
These are the different ways you can use salted eggs:
- stir them through pasta (kind of like carbonara).
- use them as the last step in stir fries.
- they go especially well with seafood. Stir it through our Singapore Chilli Crab right a the end, it’ll be amazing.
- top fried rice, noodles like kway teow and as mentioned, congee (it totally rocks with bubur lambuk!).
- add them to salads.

What to do with Salted Egg Whites?
I mentioned earlier that it’s the salted egg yolks that are the prized part. Many people just discard the salted egg whites which is a shame, really. Salted egg whites can be frozen just like their unsalted cousins. So you don’t ever have to waste them.
I use them in so many different ways, usually just how I’d use regular eggs in a savoury recipe:
- Add 1 or 2 salted egg whites when making omelettes or scrambled eggs. They are especially lovely with some grated cheese.
- Stir them through sambal side dishes like sambal goreng and sambal udang.
- Add to stir fries.
And I think that about covers it, don’t you?
Shall we get soaking?
If you like the recipe and article, don’t forget to leave me a comment and that all important, 5-star rating! Thank you!
And if you make the recipe, share it on any platform and tag me @azlinbloor, and hashtag it #linsfood
Lin xx
Salted Egg Friendly Recipes
That means you can top these recipes with salted egg yolks, or even stir them through.


Homemade Salted Eggs (2 Brining Methods)
Equipment
- 1 small saucepan
- 1 wooden ladle if needed
- 1 jar x 1 litre capacity (4-cup capacity)
Ingredients
4-Week Brining Method
- 6 duck eggs hen eggs will work too
- 500 ml water
- 300 g salt, with no additives so not table salt
- 1 tsp clear vinegar optional
8-Day Brining Method
- 6 duck eggs
- 875 ml water
- 125 ml clear vinegar or rice vinegar
- 200 g salt with no additives
Optional Spices (see article)
- 1 star anise
- stick small cinnamon
- ½ tsp black peppercorns
- ½ tsp Sichuan peppercorns
Instructions
4-Week Brining Method
- If you are using a 1-litre capacity jar, the amount of brine you have should be enough to fully submerge the eggs.If not, before making your salt solution, place your eggs in your jar and top with water to fully submerge the eggs. Then spoon the eggs out and set aside. The water that's left in the jar is how much you'll need to make your brine, so proceed with the next step.
- In a saucepan, heat the water and salt and stir to dissolve the salt. Leave to cool to room temperature.
- Place your eggs in your chosen jar and pour the cooled, room temperature salt solution (brine) over the eggs to completely submerge.

- If your eggs are floating, place some fermentation discs over to hold them down, if you have them.Or use a small saucer, upside down.Or fill a small plastic bag with water and push down on the eggs. Watch out for spillage as you do this.
- Cover the jar and place somewhere dark for 4 weeks. Then drain, and use as you like. For suggestions on how to use salted eggs and how to store them, take a look at the post.
8-Day Brining Method
- Mix 375 ml (1½ cups) water, the vinegar and 100 g (3.5 oz) of the salt in a jug or bowl. Stir to dissolve the salt.
- Place your eggs in the jar you are using, and pour this vinegar solution over to fully submerge the eggs.
- Cover and leave on your kitchen counter overnight or for 12 – 16 hours, max. This is basically overnight. But don't give it more than 16 hours.
- The Next Day: In a saucepan, heat the rest of the water (500 ml/2 cups) and salt (100 g/10½ oz) and stir to dissolve the salt. Leave to cool to room temperature.
- Drain and rinse the eggs under cool tap water. Gently rub your fingers over the shells to dislodge any residue from the shells dissolving. But don't worry too much about this.
- Rinse the jar with water to get rid of any bits. Place the eggs back in the jar.
- Pour the cooled, room temperature salt solution (brine) over the eggs to completely submerge.
- If your eggs are floating, place some fermentation discs over to hold them down, if you have them.Or use a small saucer, upside down.Or fill a small plastic bag with water and push down on the eggs. Watch out for spillage as you do this.

- Cover the jar and place somewhere dark for 4 weeks. Then drain, and use as you like. For suggestions on how to prepare them and how to store salted eggs, take a look at the article above.

3 thoughts on “Homemade Salted Eggs (2 Brining Methods)”